[ Show as SlideShow ]
Paper Processing: Basic Procedure
Contact: Volker RW Schaa (GSI Helmholtzzentrum fuer Schwerionenforschung GmbH)
Initial Instructions for Your Editing Team
CatScan Editor for Authors & Editors
JACoW Reference Search & Generatation Tool
Basic Paper Processing Procedure
LaTeX Editing, Basic
LaTeX Editing, Advanced
Quality Assurance Procedure
Tips & Tricks
Cheat Sheets
Common Author Oversights
Paper Editor's Page
CatScan Editor for Authors & Editors
The CatScan editor can be used by both authors and editors to check a DOCX or LaTeX document.
This tool in particular for Word has a rich suite of tests that it applies to the scanned document to give you guidance for corrections. To use select either the Word of LaTeX screen, select the file, followed by selecting the conference and then click scan.
The advantage of this tool is that it can be used by both the author and the editor to do initial checking of documents. Being web based it can be used at anytime, and by any number of people.
NOTE:
- This does not remove the need for editors to check documents, this must still be done as it is a “best effort” editor which can only identify to the ability of the algorithms.
- Old Word DOC files will not scan, Word documents must be DOCX.
CatScan Editor User Guide
http://scan.jacow.org
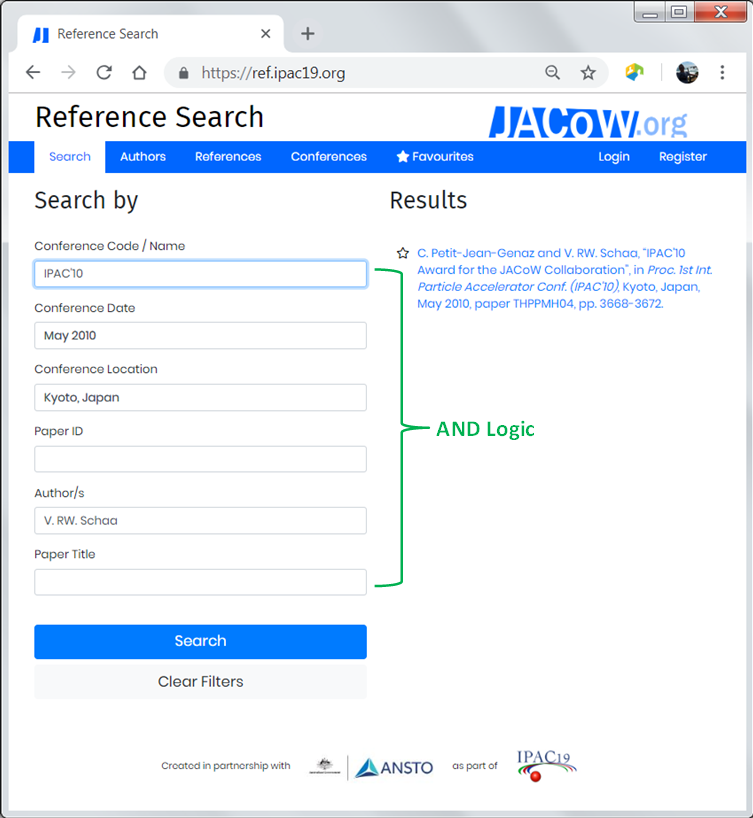
JACoW Reference Search & Generatation Tool
This tool contains a complete database of all JACoW papers which have been published on JACoW.org, and additional can included papers which have been scheduled in an upcoming conference. With this tool you can quickly search and generate Word, LaTeX, and BibTeX references which can be copy and pasted into a source document. A full user guide can be found here: Reference Search and Generation User Guide
https://refs.jacow.org
Pre-Processing
Once logged in, select the appropriate privileges (Editor or Editor and QA), and then you will see the editor interface.
- Request a paper from SPMS.
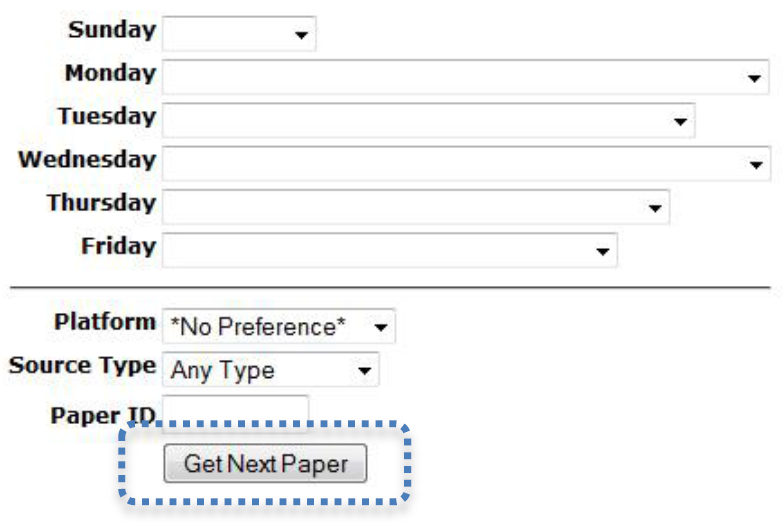
- Select the platform - in general Word papers prepared on a MAC should not be processed on a Windows PC and vice-versa. Linux, Unix, and Windows documents can be safely processed on a Windows PC. LaTeX is platform independent, so it does not matter where they will be processed.
- Select the source type you prefer to process.
- Click "Get Next Paper" or choose a specific paper from the drop-down list. Once an editor has selected a paper for processing, the author cannot resubmit without some manual intervention by the editorial staff unless the paper has received a Red dot.
- If you have no instance available an example can be downloaded here: Test Paper
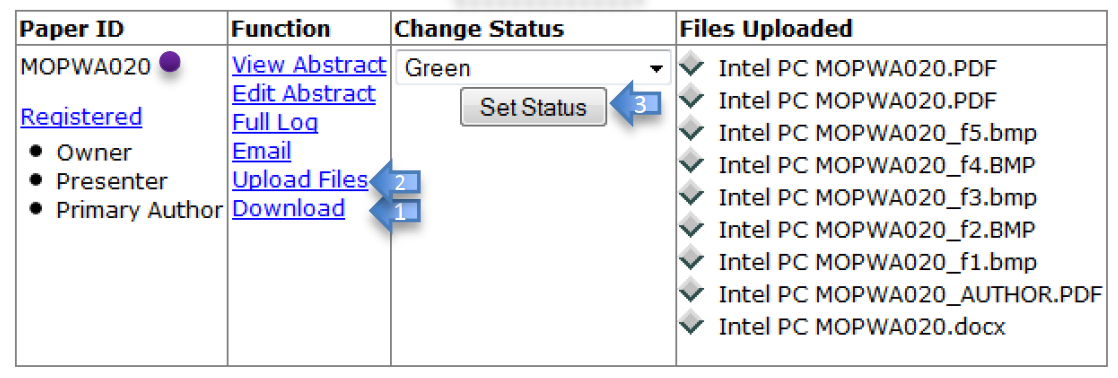
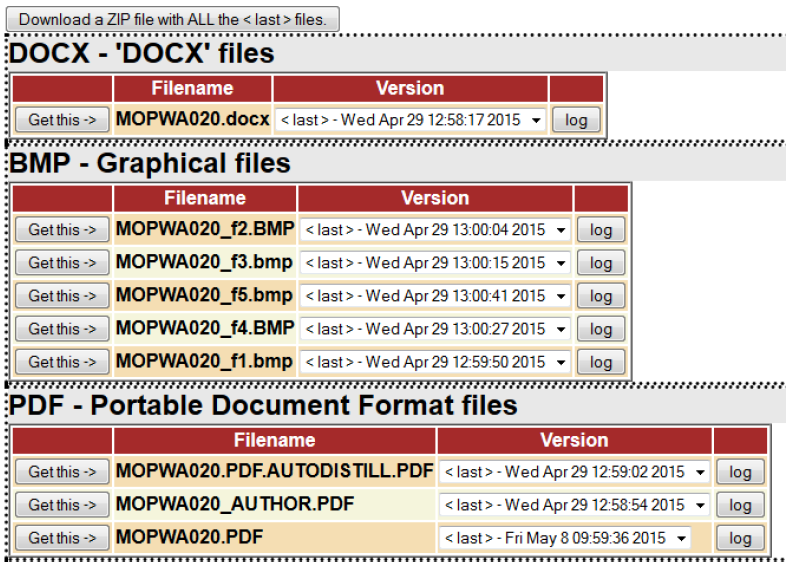
- Click on the Download link. Download the appropriate file to your computer and continue with the following steps.
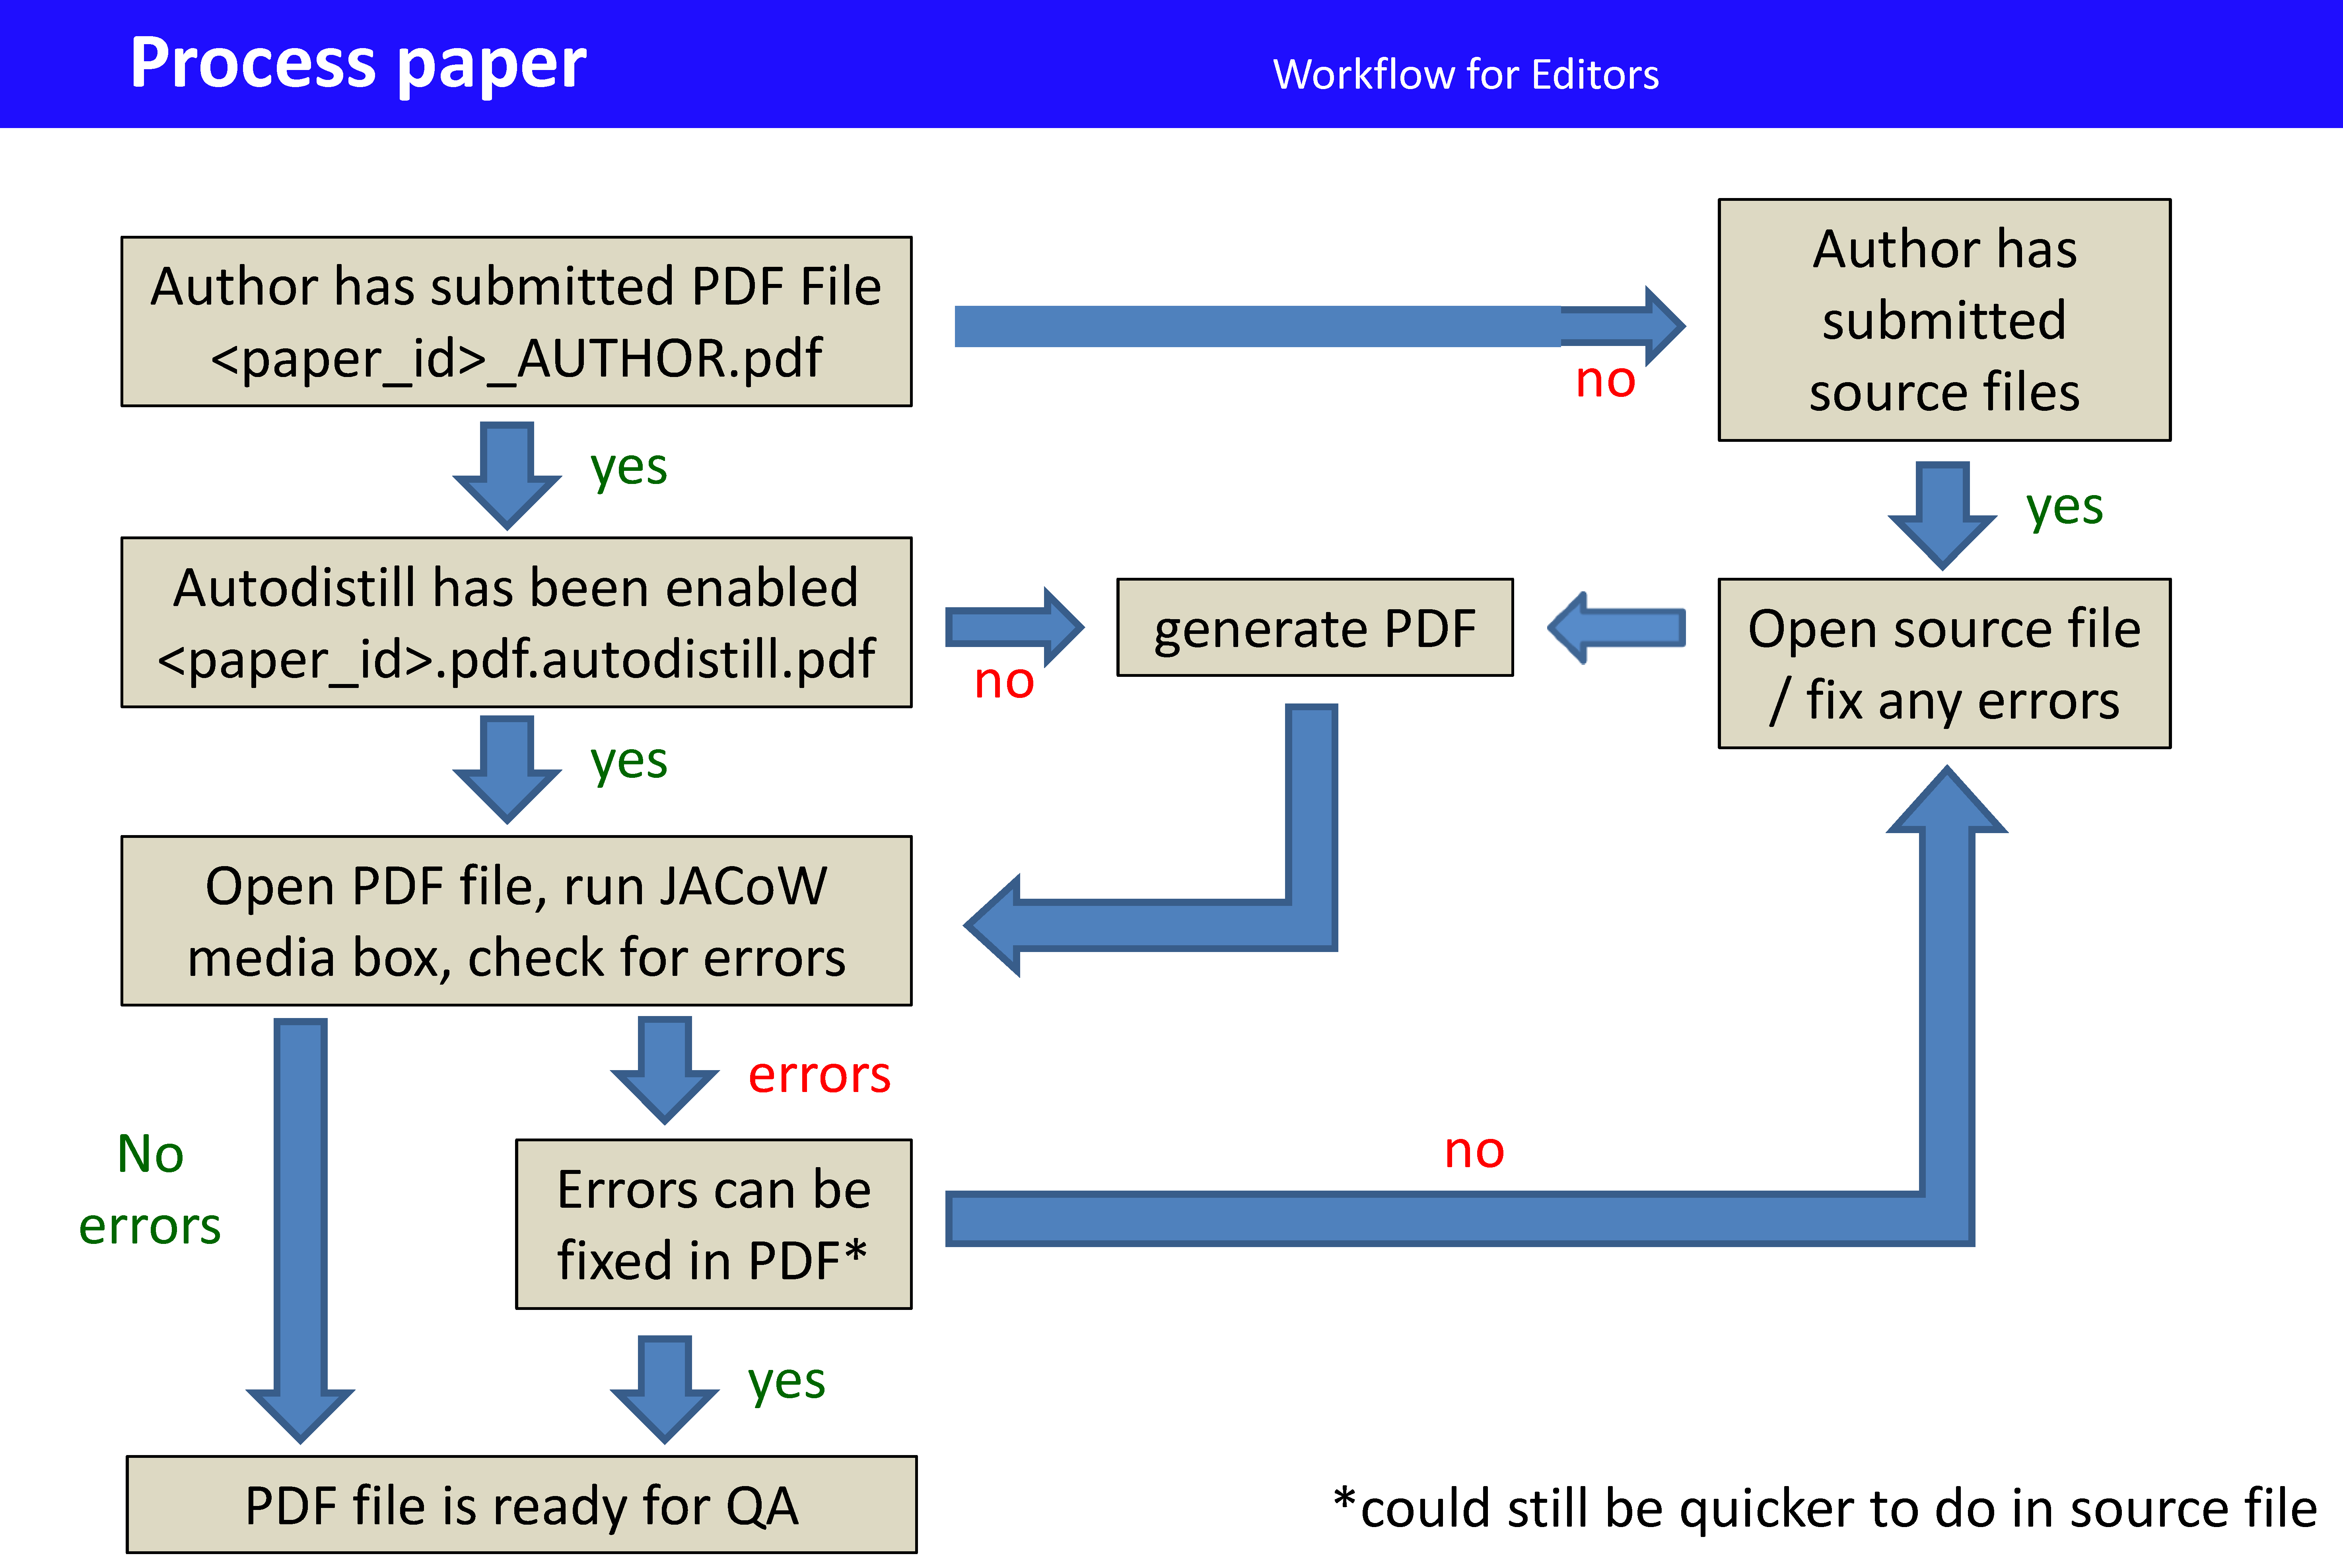
If there is a PDF file from the author, it will be named "<paper_id>_AUTHOR.PDF". With autodistill function enabled on the file server, there should also be a file named "<paper_id>.PDF.AUTODISTILL.PDF".
- If the AUTODISTILL file is useable, make any necessary changes and then save it to
<paper_id>.PDF.
- Go to Processing/Verifying the PDF File.
NOTE: For Word files, use the
Adobe PDF Printer -
DO NOT USE »PDFMaker« nor
»Save As PDF« in Word nor
»Generic PostScript Printer«.
NOTE: If you have to open the source file to create the PDF, the paper must be assigned a yellow dot, even if no changes were made to the source. If there are subsequent problems that cannot be resolved, a Red dot should be assigned.
Processing/Verifying the PDF File
See editing criteria in Quality Assurance Overview 
Check hints for editing in Editing Recommendations
Check fonts
Check number of pages
Check readability and display time
Apply the JACoW Media Box
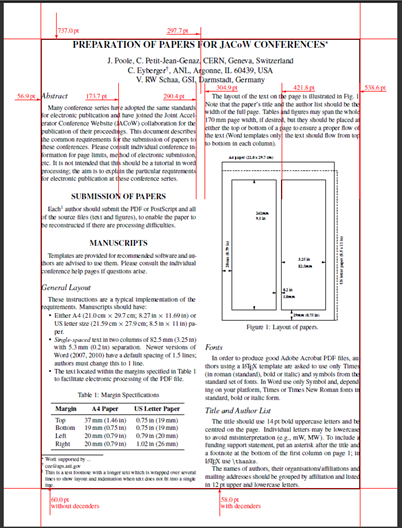
Check margins
Check page size
Check formatting and Common Author Oversights
Fix the problems (if you estimate that it takes you more than one hour, send it back to the author → red dot)
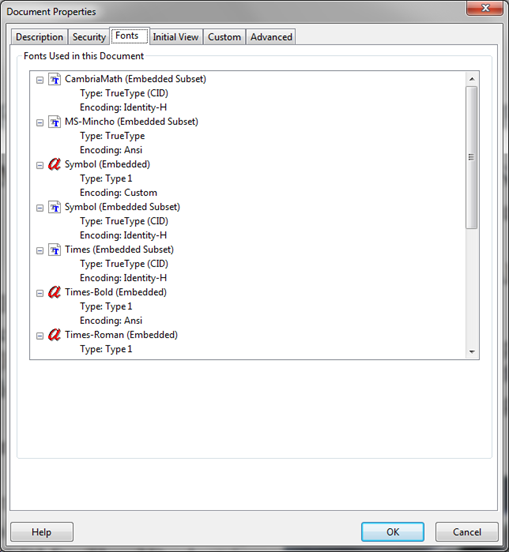
- Check the fonts by opening »File → Document Info → Fonts« (shortcut
»Ctrl + D + Fonts«). All fonts should be embedded (listed as "Embedded" or "Embedded Subset"). Font types can be "Type 1", "TrueType", or "OpenType" with any kind of encoding. If the fonts have not been embedded, use Acrobat Preflight under »Tools → Print Production → Preflight → PDF fixups → Embed fonts« (shortcut »Ctrl + Shift + X + ...«). If there is a problem, go back to the document and try to change the fonts or, if it is a LaTeX paper and you are not a LaTeX expert, pass the paper to an expert to fix the font problem. When a WORD document has been repaired, make a new PDF file.
- Check the number of pages: there are usually limits on the number of pages which vary according to the presentation type (more for oral presentations than for posters).
- Check that all pages are readable and are displayed in a reasonable time (every page should display in less than about 5/N seconds, where N is the speed of the editor's computer in GHz).
- Change to full page view and enable the grid (View → Show Form Grid or shortcut
»Ctrl-U«), if not already on.
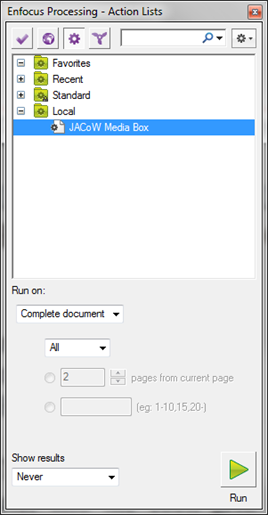
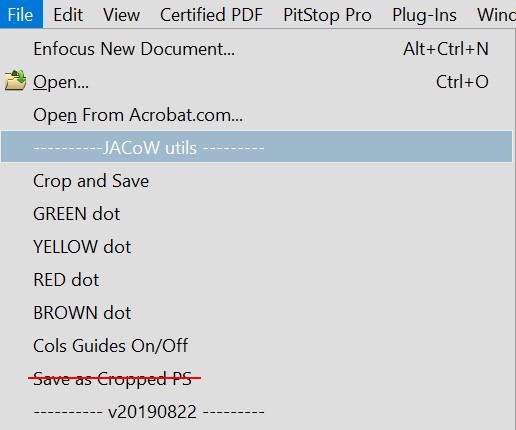
- Resize the document by using 1) »Crop and Save« from the JACoW utils by opening »File → Crop and Save« or 2) use the PitStop Action List called JACoW Media Box. Open the Action List Control Panel
 , locate the "JACoW Media Box" in the Local List and Run it.
- Check the page size at the bottom of the window: it should be 595 x 792 pt. Move the mouse pointer to the lower left corner of the screen to make the page size appear.
- The text should now be inside the margins on all pages (~±1 mm). If part of the text or graphics is outside the box, the offending objects may be moved using the "Select Object" tool in the PitStop toolbar
 and then either hold down the CTRL key or click on the move tool
  , and then use the keyboard arrows to nudge objects into position.
- If the formatting is wrong, download the source file, edit the document, make a new PDF file and go back to Step 5.
- Save the .PDF file using the Save As... command (
»Ctrl-Shift-S«).
- Check that the name of this final PDF is the <paper_id>.PDF.
- If the PDF file has to be made or remade, even if the problem is trivial (e.g., wrong paper size) assign a yellow dot, record your actions through the processing interface, check the boxes that describe the problem best, and forward the paperwork for filing. Always be clear in your comments about processing so that others can understand what the problems are. The author will be invited to download the .PDF, check it, and set the paper to green if he approves the editor's version or come to the proceedings office to proofread the paper and let the staff know whether or not the paper is acceptable.
- If the problem is very complicated and you cannot fix it yourself, check to see whether another editor can fix it. If this is the case, ask the alternative editor to reassign the paper to himself.
- If it is estimated that a paper will take more than an hour to fix, assign a red dot, clearly explain the problem through the processing interface, and ask the author to fix at his earliest convenience.
Post-Processing Procedure
- Print & check visually
- Print the processed paper from the final PDF in colour and check it visually.
Sometimes papers look good on screen and awful in print. Both media should be OK.
- If the PDF is not printable, proceed with the electronic steps only and then assign a red dot in the SPMS.
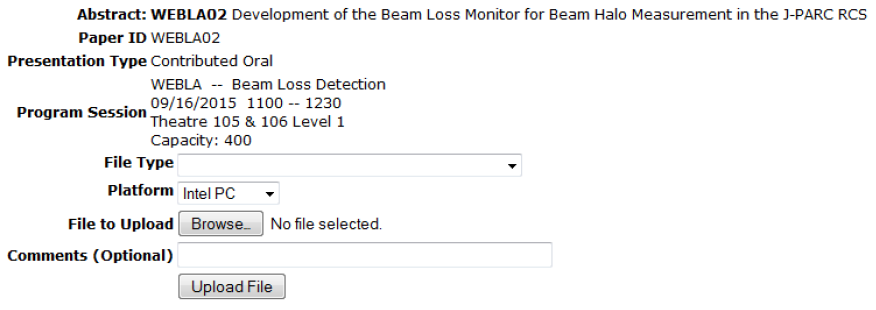
- Upload all processed files to SPMS
(no need to upload unchanged source files). If you are replacing the author's source or PDF file, you must do so before setting the status; otherwise, the paper will be flagged as having received new files after its status was set.
- Dot the paper with the stamping tool in Acrobat
(installed scripts »JACoWSetDot.js« — options under "File..")
- Green dot
- Nothing is wrong
- No further action required
- Yellow dot
- Source file changed to fix problems
- Author should proofread
- Red dot
- Extensive work necessary, author should fix and resubmit
- Author should come to the proceedings office
- Brown dot
- Major screw-up, template not used
- Only for education in the editorial office
|
|
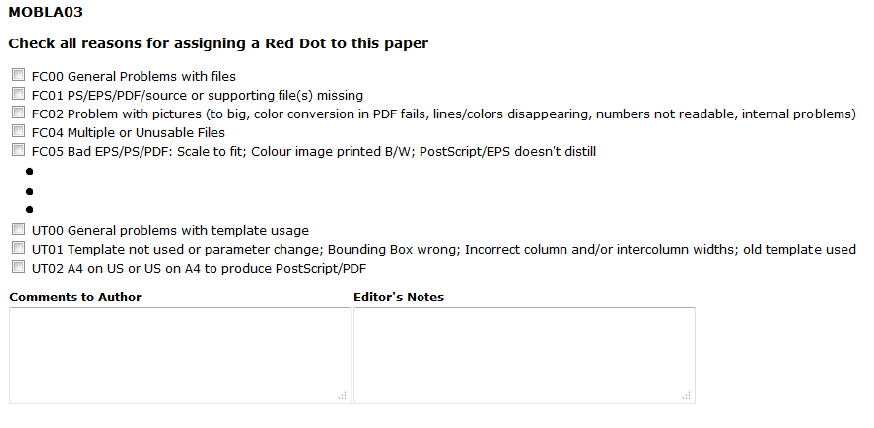
- Use SPMS to set status and error codes
- After upload - use the SPMS interface to set the status to red, yellow, or green.
- Enter explicit comments if there were problems and check the boxes to indicate what type of problems were found. Click the Save button.
- If there were problems, be explicit in your comments so that the staff in author reception can explain the problem(s) to the author.
- Author comments can be seen by the author. Editor's notes can be seen only by the editorial staff.
- Place the paperwork in the appropriate place for filing.
- Click "Get Next Paper" to be assigned your next paper for processing.